Introduction
Building your own storage furniture is a rewarding project that not only enhances your home but also allows you to customize it to your needs. However, one of the most important decisions you will make during this process is when to stain your furniture. Staining at the right time can ensure a beautiful finish while also saving you money. In this article, we'll explore the best timing for staining your DIY storage furniture, along with some cost-saving tips and affordable materials.
Understanding the Staining Process
Before diving into the timing, it's important to understand what staining does. Staining enhances the wood's natural beauty, adds color, and helps protect it from wear and tear. However, the timing of your staining plays a crucial role in achieving the best results.
Why Timing Matters
Staining too early or too late can lead to problems such as poor adhesion, uneven coloring, or a finish that doesn’t last. Here are some factors to consider when deciding when to stain your DIY storage furniture:
When to Stain Your Furniture
Here are some guidelines on the best times to stain your furniture:
- After Assembly: One of the best times to stain your furniture is after the assembly is complete. This ensures that all surfaces are easily accessible without any obstructions.
- Before Hardware Installation: Staining before installing handles, hinges, or other hardware can give you a clean finish without worrying about overspray or staining hardware.
- Check for Moisture: Always check the moisture content of your wood before staining. Ideally, the moisture content should be below 12%. If the wood feels damp, wait for it to dry before applying stain.
- Temperature and Humidity: The ideal conditions for staining are temperatures between 50°F and 90°F with low humidity. High humidity can extend drying times, while low humidity can cause the stain to dry too quickly.
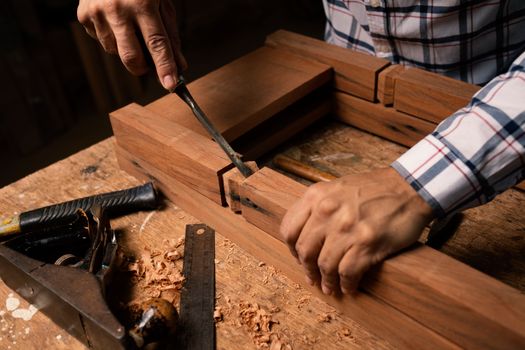
- Final Sanding: Ensure you sand your furniture down properly before staining. This will help the stain adhere better and result in a smoother finish.
Cost-Saving Tips for Staining Your DIY Furniture
Staining can be an additional cost to your furniture project, but there are ways to keep expenses down:
- Choose Affordable Stains: There are plenty of budget-friendly stains available that offer great results. Look for water-based stains, which are often cheaper and easier to clean up than oil-based options.
- Buy in Bulk: If you’re planning multiple projects, consider buying larger containers of stain. This can often save you money in the long run.
- Use Natural Alternatives: If you're looking for a more budget-friendly and eco-friendly option, consider using natural dyes, such as coffee or tea, to stain your wood.
- Utilize Leftover Materials: If you have leftover stain from previous projects, utilize it to avoid purchasing more. Mixing different stains can also create a unique color.
- DIY Brushes: Instead of buying expensive brushes, use foam brushes or even old rags for applying stain, which often provide better results and save money.
Finding Plans for Your DIY Storage Furniture
If you are unsure about how to build your DIY storage furniture, consider utilizing resources like Ted Woodworking. Ted Woodworking offers a wide range of plans that can help you create your furniture efficiently and affordably.
Final Steps: Applying the Stain
Once you’ve assembled your furniture and determined it’s the right time to stain, follow these steps for a successful application:
- Prepare Your Workspace: Ensure your workspace is clean and well-ventilated. Lay down a drop cloth to protect your floors.
- Test the Stain: Always do a test stain on a scrap piece of wood to see how the color turns out before applying it to your furniture.
- Apply Evenly: Use a brush or rag to apply the stain evenly. Avoid over-saturating the wood to prevent drips.
- Allow to Dry: Follow the manufacturer's instructions for drying times. Consider applying a second coat for a richer color.
- Seal the Finish: After the stain has dried, consider sealing it with a clear coat to protect it from scratches and moisture.
Conclusion
Staining your DIY storage furniture at the right time is essential for achieving a beautiful and lasting finish. By understanding the best timing for staining and implementing cost-saving tips, you can create stunning furniture that fits your budget. Don’t forget to explore resources like Ted Woodworking for plans and ideas to guide your projects.
FAQ
1. Can I stain my furniture immediately after assembling it?
It's best to wait until any adhesives are fully cured and the wood is dry before staining to ensure the best results.
2. How long should I wait before applying a second coat of stain?
Typically, you should wait anywhere from 2 to 24 hours, depending on the stain and environmental conditions. Always check the manufacturer's instructions.
3. Is it necessary to seal my stained furniture?
While not mandatory, sealing your stained furniture with a clear coat can provide extra protection against scratches and moisture, prolonging its lifespan.
📚 Related Articles
🔨 Want 16,000+ Woodworking Plans?
Get instant access to step-by-step plans with blueprints and cut lists.
Get Instant Access →