How to Make a Rustic Outdoor Coffee Table from Logs
Creating a rustic outdoor coffee table from logs is a rewarding project that can enhance your outdoor space. Not only does it add charm, but it also provides a functional piece of furniture for your patio or garden. In this beginner-friendly guide, we will walk you through the steps to build your own rustic coffee table using basic tools and materials.
Materials and Tools Needed
- Materials:
- 3-4 logs (depending on size)
- Wood screws or bolts
- Wood glue
- Sandpaper (medium and fine grit)
- Wood finish (optional)
- Tools:
- Hand saw or chainsaw
- Drill with drill bits
- Screwdriver
- Measuring tape
- Square
- Pencil
- Clamps (optional)
Step 1: Choose Your Logs
Select logs that are relatively straight and have a diameter of about 4-6 inches. You can use hardwoods like oak or softwoods like pine, depending on what is available to you. Make sure the logs are dry and free of rot or pests.
Step 2: Cutting the Logs
Using a hand saw or chainsaw, cut the logs to your desired lengths. For a coffee table, you might want the logs to be around 18 inches tall and the tabletop to be approximately 40 inches long. Ensure you measure carefully and mark your cuts with a pencil.
Step 3: Preparing the Logs
Once the logs are cut, it’s time to prepare them for assembly. Use medium-grit sandpaper to smooth out rough edges and surfaces. This will not only make the table look better but also prevent splinters.
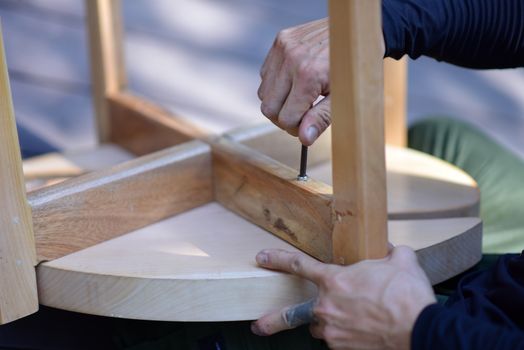
Step 4: Assembling the Base
For the table's base, take two logs for the sides and one log for the center support. Position the side logs parallel to each other and the center log perpendicular between them, about 10 inches from the bottom. Use a drill to create holes through the center log into the side logs. Secure them using wood screws or bolts. If you prefer added stability, apply wood glue before screwing them together.
Step 5: Creating the Tabletop
For the tabletop, you can either use one large log or several smaller logs placed side by side. If using multiple logs, ensure they are the same height and secure them together using wood screws or bolts. If you have a single large log, simply lay it across the top of the base you constructed.
Step 6: Finishing Touches
After your table is assembled, give the entire piece another sanding with fine-grit sandpaper for a smooth finish. If you want to protect your table from the elements, consider applying a wood finish or sealer. This can help prolong the life of your table and keep it looking great.
Step 7: Final Assembly
Once the finish is dry, place the tabletop on the base and secure it with additional screws if necessary. Make sure everything is tightly secured and stable before using your new rustic outdoor coffee table.
Helpful Resources
For more detailed plans and designs, you can refer to Ted Woodworking. They offer a wide range of woodworking plans that can help you with other projects as well.
Conclusion
Building a rustic outdoor coffee table from logs is a simple and enjoyable project that can be completed in a weekend. With just a few basic tools and materials, you can create a stunning piece that will serve as a focal point in your outdoor space. Don't forget to personalize your table with unique finishes or decorations to make it truly yours!
FAQs
- What type of wood is best for outdoor furniture?
Hardwoods like teak or cedar are ideal due to their durability and resistance to weather. Softwoods can work too, but they may require more maintenance.
- How do I protect my rustic coffee table from the elements?
Applying a weather-resistant sealant or outdoor wood finish can help protect your table from moisture and UV damage. Regular maintenance will also prolong its life.
- Can I use treated wood for my outdoor coffee table?
Yes, treated wood can be used, but ensure it is safe for outdoor use and won't leach chemicals into the environment.
📚 Related Articles
🔨 Want 16,000+ Woodworking Plans?
Get instant access to step-by-step plans with blueprints and cut lists.
Get Instant Access →