How to Build a Stylish Wooden Bench for Your Entryway
Building a stylish wooden bench for your entryway not only adds functionality but also enhances the aesthetic appeal of your home. A well-crafted bench can serve as a perfect spot for putting on shoes, storing items, or simply adding a decorative touch. However, like any woodworking project, there are common mistakes that can turn a fun DIY project into a frustrating experience. In this article, we will guide you through the process of building your own entryway bench while highlighting common pitfalls and offering troubleshooting tips.
Materials and Tools You'll Need
- Materials:
- Wood (such as pine, oak, or plywood)
- Wood screws
- Wood glue
- Sandpaper
- Wood stain or paint
- Finish (optional)
- Tools:
- Saw (circular or miter saw)
- Drill
- Screwdriver
- Sanding block or electric sander
- Measuring tape
- Clamps
Step-by-Step Building Process
1. Planning Your Design
Before you start cutting wood, it’s crucial to have a clear design in mind. Decide on the dimensions and style of your bench. Consider how much space you have in your entryway and what style will complement your existing decor. This is a common area where mistakes occur; without a solid plan, you may find yourself with a bench that doesn't fit the space or looks out of place.
2. Cutting the Wood
Once you have your design, measure and cut your wood pieces accordingly. Typical dimensions for a bench might be 48 inches long, 18 inches high, and 14-20 inches deep. When cutting, take your time to ensure the cuts are straight and accurate. A common mistake is rushing through this step, which can lead to uneven pieces. If you're unsure about your cutting skills, consider using a miter saw for cleaner cuts.
3. Assembling the Bench
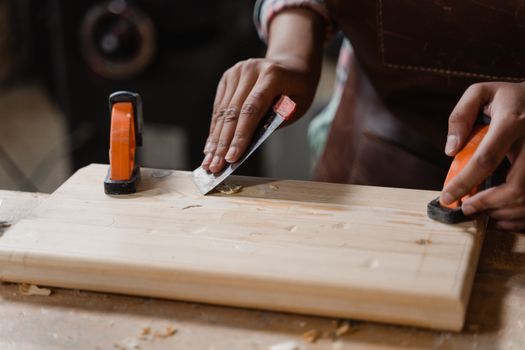
Begin by assembling the main structure of your bench. Lay out the bench top and the legs, and use wood screws and wood glue to secure them. Make sure everything is square, which can be tricky; if your bench doesn’t sit flat, it can wobble. To troubleshoot this, use clamps to hold pieces in place while you drill the screws. Additionally, double-check your measurements during assembly to avoid a crooked bench.
4. Sanding and Finishing
After assembly, sand the entire bench thoroughly to remove any rough edges or splinters. This step is often overlooked, leading to a bench that looks unfinished. Use a fine-grit sandpaper for a smooth finish. Once sanded, apply your choice of wood stain or paint. Be cautious here; applying too much stain can lead to a blotchy finish. If that happens, sand it down lightly and reapply a thinner layer.
5. Adding Storage (Optional)
If you’d like to incorporate storage into your bench, consider adding a shelf or a drawer. This can be a bit more complex, especially if you are unfamiliar with drawer construction. A common mistake is not allowing enough clearance for the drawer to open smoothly. To avoid this, measure twice and allow a slight gap when assembling the drawer box.
Common Mistakes to Avoid
- Skipping the Plan: Not having a clear plan can lead to incorrect measurements and cuts.
- Using Poor Quality Wood: Opting for lower-quality wood can result in a bench that doesn’t last. Invest in good wood for durability.
- Rushing the Assembly: Take your time during assembly to ensure accuracy and a sturdy structure.
- Ignoring Finishing Touches: A well-finished bench looks professional. Don’t skip sanding and applying a proper finish.
Troubleshooting Tips
- Wobbly Bench: If your bench wobbles, check that all legs are of equal length and that the bench is assembled squarely. You can also adjust leg lengths by adding felt pads to the shorter legs.
- Uneven Surface: If the surface is uneven, re-sand the areas that are higher or lower to create a flat surface.
- Blotchy Finish: If your stain looks uneven, sand it down lightly and apply a new coat, ensuring to wipe off excess stain promptly.
Resources for Plans
If you’re looking for detailed plans to guide you through the process, consider checking out Ted Woodworking. They offer a variety of woodworking plans that can help you create not only a bench but many other furniture pieces as well.
Conclusion
Building a wooden bench for your entryway can be a rewarding project, especially when you take the time to plan and execute it properly. By avoiding common mistakes and following the tips provided, you can create a beautiful and functional piece of furniture that enhances your home.
FAQs
- Q: What type of wood is best for an entryway bench?
A: Hardwoods like oak or maple are durable, while softwoods like pine are easier to work with and more affordable. - Q: How do I ensure my bench is sturdy?
A: Use strong joints, such as pocket hole screws or dowels, and make sure to assemble it squarely. - Q: Can I customize the design?
A: Absolutely! Feel free to modify dimensions, styles, and finishes to suit your taste and space.
📚 Related Articles
🔨 Want 16,000+ Woodworking Plans?
Get instant access to step-by-step plans with blueprints and cut lists.
Get Instant Access →