How to Make a Stylish Dresser from Reclaimed Wood
Building a dresser from reclaimed wood not only gives you a unique piece of furniture but also contributes to sustainable woodworking practices. In this article, we will dive into advanced techniques focusing on precision joinery and achieving a professional finish. With careful planning and execution, you can create a stylish dresser that showcases the beauty of reclaimed wood.
Choosing the Right Reclaimed Wood
Before you start building, the first step is to select the right pieces of reclaimed wood. Look for wood that is free of excessive knots, cracks, and warps. Common sources include old barns, pallets, and discarded furniture. You may encounter various species, so choose one that fits your desired aesthetic. Some popular options include:
- Pine: Light and easy to work with, ideal for a rustic look.
- Oak: Durable with a beautiful grain, perfect for a more sophisticated dresser.
- Maple: Hard and sturdy, great for a sleek finish.
Designing Your Dresser
Sketch your design, incorporating both functionality and style. Consider the dimensions based on your space and the amount of storage you need. A typical dresser might have four to six drawers, so plan accordingly. Ensure that your design includes:
- Drawer dimensions that allow for smooth operation.
- Clearances for airflow and ease of access.
- Aesthetic features like contrasting wood tones or hardware.
Advanced Joinery Techniques
To achieve a professional finish, focus on precise joinery techniques that will enhance the durability and look of your dresser. Here are a few you might consider:
Dovetail Joints
Dovetail joints are a hallmark of quality furniture-making, providing strength and visual appeal. They are commonly used in drawer construction. To create dovetail joints:
- Use a dovetail jig for accuracy.
- Mark your wood precisely and cut using a table saw or a hand saw.
- Chisel out the waste carefully for a perfect fit.
Mortise and Tenon Joints
This joint is ideal for attaching the dresser’s legs to the top or sides. It offers exceptional strength. To create a mortise and tenon joint:
- Mark the mortise on the leg and the tenon on the rail.
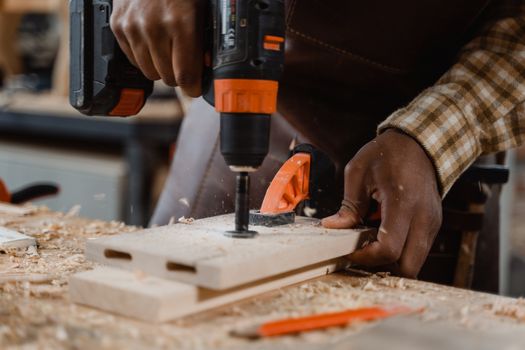
- Use a chisel and a drill to create the mortise hole.
- Cut the tenon to fit snugly into the mortise, ensuring a tight fit.
Box Joints
Box joints are another excellent option for drawer construction. They are simple to make and add an attractive detail. Follow these steps:
- Set up your table saw for box joints.
- Cut matching notches into the ends of the drawer sides.
- Glue and clamp the joints for a secure hold.
Precision Cutting and Assembly
Precision is key in woodworking. Invest in high-quality tools to ensure your cuts are accurate. A table saw, miter saw, and router will be essential for this project. When cutting your pieces:
- Measure twice, cut once to avoid mistakes.
- Use a stop block for repeatable cuts.
- Keep your blades sharp for clean edges.
After cutting, dry fit all your pieces before applying glue. This step ensures everything aligns perfectly. Once satisfied:
- Apply wood glue to the joints and assemble.
- Use clamps to hold the assembly together while the glue dries.
Achieving a Professional Finish
The finish of your dresser is what will ultimately define its style and protect the wood. Here are steps to achieve a stunning finish:
- Sanding: Start with coarse grit sandpaper (80-120 grit) and progress to finer grits (220-320 grit) for a smooth surface.
- Staining: Apply a wood stain to enhance the natural beauty of the reclaimed wood. Test on a scrap piece first to ensure you achieve the desired color.
- Sealing: Use a polyurethane or varnish for protection. Apply multiple thin coats, sanding lightly between each for the best results.
Final Assembly and Hardware Installation
Once your finish is dry, it’s time to attach the hardware. Choose drawer pulls and knobs that complement your design. Install them at a consistent height for a polished look. Finally, attach the drawers to the slides and make any necessary adjustments to ensure smooth operation.
Resources for Further Learning
If you are looking for detailed plans and additional resources, consider visiting Ted Woodworking. They offer a wide variety of plans that can guide you through the woodworking process, ensuring your projects are successful.
Conclusion
Building a stylish dresser from reclaimed wood can be a fulfilling project that enhances your bedroom decor. By employing advanced joinery techniques and focusing on precision and finish, you can create a piece that is not only functional but also a testament to your craftsmanship.
Frequently Asked Questions
1. How do I maintain a dresser made from reclaimed wood?
Regular dusting and occasional use of furniture polish will keep your dresser looking great. Avoid harsh chemicals that can damage the finish.
2. Can I use reclaimed wood for other furniture projects?
Absolutely! Reclaimed wood is versatile and can be used for tables, shelves, or even accent pieces.
3. What tools do I need to build a dresser?
A table saw, miter saw, drill, chisel set, and sanding tools are essential. Additionally, clamps and a level will help with assembly.
📚 Related Articles
🔨 Want 16,000+ Woodworking Plans?
Get instant access to step-by-step plans with blueprints and cut lists.
Get Instant Access →