How to Build a Wooden Blanket Chest: A Step-by-Step Guide
Are you looking to add a functional and stylish piece to your bedroom decor? A wooden blanket chest is an excellent choice for blanket storage and can enhance your home decor with its unique charm. In this article, we will guide you through the process of how to make a wooden blanket chest, complete with essential woodworking techniques and tips.
Why Build a Blanket Chest?
A blanket chest not only serves as a practical solution for storing blankets, but it also doubles as a beautiful piece of furniture. With various wood types and furniture design options available, you can customize your blanket chest to fit your personal style and space.
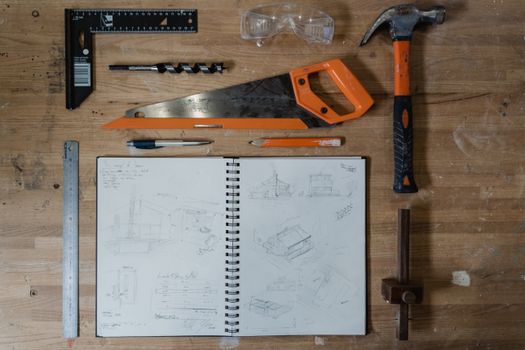
Tools and Materials Needed
- Wood (Pine, Oak, or Cedar are popular choices)
- Wood glue
- Wood screws
- Sandpaper
- Wood finish (stain or paint)
- Measuring tape
- Table saw or circular saw
- Drill
- Screwdriver
- Clamps
Step-by-Step Blanket Chest Tutorial
Now that you have your materials ready, let’s dive into this step by step blanket chest tutorial.
Step 1: Planning Your Chest Design
Before you start building, sketch out your design. Consider the size and shape of your blanket chest. A common size is around 40 inches long, 18 inches wide, and 20 inches high. This will provide ample blanket storage while fitting well in most rooms.
Step 2: Choose the Best Wood for Blanket Chest
When selecting the best wood for a blanket chest, consider durability and aesthetics. Cedar is a favorite due to its natural resistance to moisture and insects, making it ideal for blanket storage. However, Pine and Oak are also excellent options for their strength and beautiful finishes.
Step 3: Cutting the Wood
Using your table saw or circular saw, cut the wood pieces according to your design. You will need:
- Top panel
- Front, back, and side panels
- Bottom panel
Step 4: Joinery Methods
For sturdy chest construction, choose appropriate joinery methods. Pocket hole joinery is a great option for beginners. Drill pocket holes in the side panels, then attach them to the bottom panel using wood screws.
Step 5: Assembling the Chest
Using wood glue and clamps, assemble the panels. Start with the bottom, then attach the side panels, followed by the back and front panels. Ensure everything is square and secure.
Step 6: Attaching the Top
Once the frame is complete, attach the top panel. Consider using hinges if you want the lid to open easily. This will make accessing your blankets simple and efficient.
Step 7: Sanding and Finishing Techniques
Sand the entire chest using fine-grit sandpaper to ensure a smooth finish. After sanding, apply your chosen finishing techniques, whether it’s a stain to enhance the wood grain or a paint for a pop of color.
Step 8: Final Touches
Once the finish is dry, add any decorative elements you desire, such as handles or stencils. This will personalize your blanket chest, making it a unique addition to your home.
Practical Tips for Building Your Blanket Chest
- Consider using DIY Wooden Vanity Table Plans to learn more about furniture construction methods.
- Always work in a well-ventilated area, especially when applying finishes.
- Follow safety guidelines when using power tools to avoid accidents.
Frequently Asked Questions
1. What wood is best for a blanket chest?
The best wood for a blanket chest is typically Cedar, due to its natural resistance to moisture. However, Pine and Oak are also great choices for their durability and aesthetic appeal.
2. How long does it take to build a blanket chest?
Depending on your skill level and the complexity of your design, it can take anywhere from a few hours to a couple of days to complete.
3. Can I find DIY plans for a blanket chest?
Yes, there are plenty of resources available, including Ted's Woodworking, which offers detailed plans for various woodworking projects, including blanket chests.
Conclusion
Building a wooden blanket chest is an easy and rewarding easy blanket chest woodworking project. With the right materials and a little patience, you can create a beautiful and functional piece of furniture that enhances your home decor. Whether you choose to store blankets or use it for other purposes, your handmade blanket chest will be a cherished addition for years to come.
🔨 Want 16,000+ Woodworking Plans?
Ted's Woodworking gives you instant access to over 16,000 step-by-step plans with detailed blueprints, cut lists, and material lists for every project.
Get Instant Access →